The computer issues that tend to irritate us the most are those that occur when we least expect them to. You’re just about to start work on your computer or maybe complete a tax return and your mouse starts to act up.
Fortunately, unless your hardware component is physically damaged, the vast majority of such issues can be fixed. You just need to know how to go about fixing them.
Check Your Mouse
The first thing you’ll want to do when you encounter problems with your mouse is to ensure that your mouse is suitably situated in its PC port.
You should consider unplugging it from its port, then reconnecting it into a different port, a viable option for those with USB mouses.
If the issue has only just started to occur when you should try restarting your computer as the problem may only be temporary.
Incompatible Drivers
If all the physical stuff is in order (device in the correct port, properly seated), then you’ll want to look into the drivers next. Depending on your version of Windows, the operating system will typically take care of all driver updates, however, that doesn’t mean you shouldn’t consider doing it manually.
1. First, boot into your computer with full administrative rights.
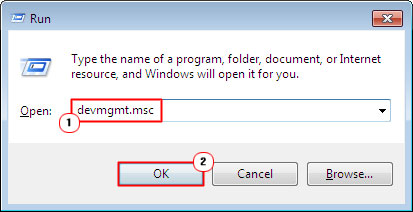
2. Then press Windows Key + R, and type devmgmt.msc into the Run Command box and click on OK.
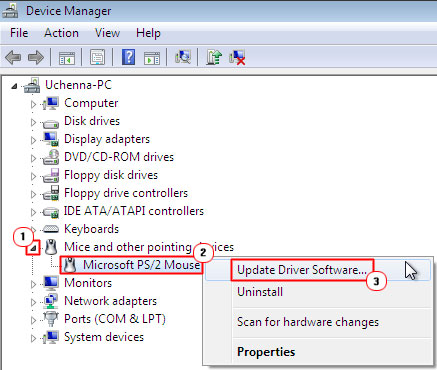
3. Once Device Manager loads up, click on the + icon next to Mice and other pointing devices, then right-click on your mouse and select Update Drivers.
If you’ve downloaded the most up-to-date drivers for your mouse, then you will need to point the InstallShield towards it. Using the browse option, it should start updating the drivers, once done; you will have to reboot your computer.
If you haven’t already downloaded the most up-to-date drivers for your mouse, then you will need to select the option to automatically search for updated drivers. However, in most cases, the InstallShield will fail to find updated drivers, but it’s still worth a try, nonetheless.
If it doesn’t find any new updates, then you will need to manually reinstall the drivers. In most cases, you won’t need to enter the device manager, simply double-clicking on the Setup.exe file should be sufficient, as it will automatically update the driver files that need updating.
Just be sure to download the correct drivers for your operating system. You will need to pay attention to the brand, model number, and OS.
Alternatively, if you find it too complex, then you can use an automated driver updater tool. These tools are designed specifically for updating the drivers on your computer. They can also be scheduled to do so on a regular basis, eliminating the need for you to update your drivers in the future. So yes, they are a very effective and viable option.
Disable Realtek
If you have a Realtek HD audio manager running on your computer, then there is a good chance that this tool is the cause of the mouse issues you are currently experiencing. Thus, you may want to consider disabling it to fix the problem. To disable Realtek, simply right click on its Taskbar icon (bottom left-hand corner) and select Disable, then reboot your computer.
This is a common method of repairing freezing mouse issues.
Reset Mouse Acceleration
Mouse acceleration problems can be quite annoying, especially if you use your mouse for gaming. Try playing a first-person shooter with a mouse that has a mind of its own, shifting to the left, when you want it to move to the right, it can be a very unpleasant experience.
Many end users have reported such problems in a number of different situations, but it doesn’t appear as though there is a real fix for this issue. Resetting mouse acceleration has however appeared to fix the problem for many end-users.
To do that, simply do the following:
1. First, boot into your computer with full administrative rights.
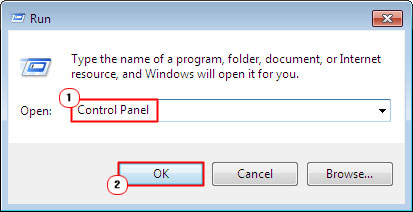
2. Then press Windows Key + R, and then type Control Panel into the Run Command box and click on OK.
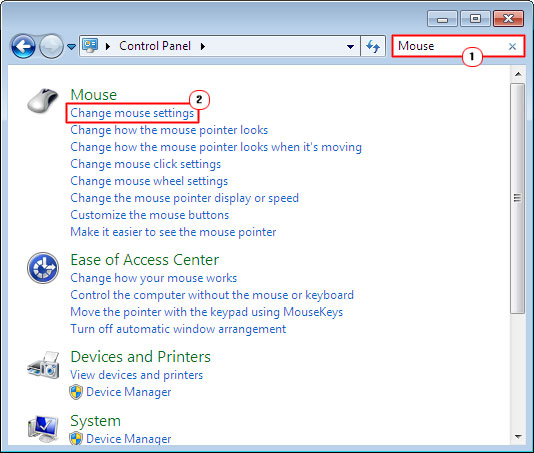
3. Once Control Panel loads up, type Mouse into the Search Control Panel box and click on Change mouse settings.
4. This will load up the Mouse Properties applet, from here; click on the Pointer Options Tab, then un-tick the box next to Enhance pointer precision and click on OK.
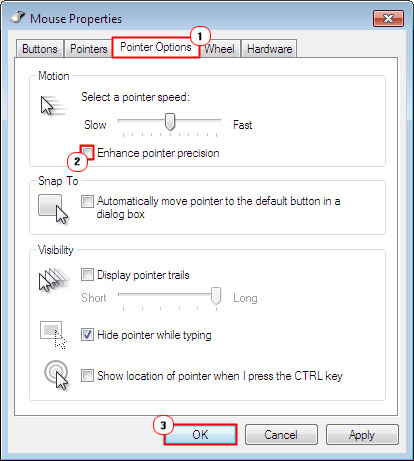
5. Click on Change mouse settings from Control Panel and repeat Step 4, but this time, tick the box next to Enhance pointer precision and click on OK.